Welcome to your comprehensive guide on how to replace the ear pads on your Beats Studio 3 headphones. Over time, the ear pads may wear out or get damaged, affecting both the comfort and sound quality of your beloved headphones. Fortunately, replacing the ear pads is a simple process that can breathe new life into your headphones and enhance your listening experience. In this guide, we will take you through each step, ensuring a smooth and successful replacement.
Before we dive into the details, let’s take a closer look at why replacing the ear pads is essential and the signs that indicate it’s time for a replacement. We’ll also discuss the factors you should consider when buying replacement ear pads to ensure the best fit and performance for your Beats Studio 3 headphones.
Key Takeaways:
- Replacing the ear pads on your Beats Studio 3 headphones can revive comfort and sound quality.
- Signs that indicate it’s time to replace the ear pads include flaking, discomfort, stench, deformation, and ineffective noise cancellation.
- Consider factors such as pad quality, material, and size when purchasing replacement ear pads.
- Follow our step-by-step guide to remove the old ear pads and install the new ones with ease.
- Applying pressure and allowing for proper adhesion is crucial for optimal performance.
Introduction to Beats Studio 3 Ear Pad Replacement
If you own a pair of Beats Studio 3 headphones, you may have noticed that the ear pads can wear out over time, affecting both the comfort and sound quality of your headphones. Luckily, replacing the ear pads is a straightforward process that can restore your headphones to their original condition and provide you with an enhanced listening experience.
When it comes to finding replacement ear pads for Beats Studio 3, there are various options available in the market. It’s important to choose high-quality ear pads that are specifically designed for the Studio 3 model to ensure a perfect fit and optimum performance.
Whether you’re a music enthusiast or a casual listener, upgrading your Beats Studio 3 ear pads can make a significant difference in your overall audio experience.
In this guide, we will walk you through the step-by-step process of removing the old ear pads and installing the new ones. We’ll also provide you with essential tips and recommendations to help you choose the right ear pads for your Beats Studio 3 headphones.
Why Replace Beats Studio 3 Ear Pads?
Over time, the ear pads on your Beats Studio 3 can deteriorate due to regular use and exposure to sweat and moisture. This can lead to a loss of cushioning and support, making the headphones less comfortable to wear. By replacing the ear pads, you can ensure maximum comfort and improve the overall performance of your headphones. The new ear pads will provide a snug fit, allowing you to enjoy your favorite music for extended periods without any discomfort.
Upgrading your Beats Studio 3 ear pads is not only about comfort; it also enhances the sound quality and noise isolation of your headphones, delivering a more immersive listening experience.
Now that you understand the importance of replacing the ear pads, let’s dive into the process of removing the old ones and installing the new ear pads on your Beats Studio 3 headphones.
References:
- https://www.beatsbydre.com/support/how-to/earpads/replacement
- https://www.headphonezone.in/blogs/buying-guide/how-to-change-ear-pads-on-beats-studio-headphones
- https://www.reddit.com/r/headphones/comments/8x0l47/beats_studio_3_ear_pad_replacement_guide/
Why Replace Beats Studio 3 Ear Pads?
The ear pads on the Beats Studio 3 headphones play a crucial role in providing comfort and support while you enjoy your favorite music. Over time, these ear pads may start to deteriorate due to regular use or exposure to sweat and moisture. This can result in a loss of cushioning and support, making the headphones less comfortable to wear.
By replacing the ear pads, you can ensure that your Beats Studio 3 headphones remain as comfortable as they were on day one. The new ear pads will provide a soft and supportive cushioning for your ears, allowing you to enjoy long listening sessions without discomfort. Additionally, replacing worn-out ear pads can improve the overall performance of your headphones, enhancing the sound quality and noise isolation.
Whether you use your Beats Studio 3 headphones for work, travel, or leisure, replacing the ear pads is a simple and effective way to maintain their comfort and performance. With the right replacement ear pads, you can continue to enjoy your music in style and comfort.

Benefits of Replacing Beats Studio 3 Ear Pads:
- Restore comfort and support to your headphones
- Enhance sound quality and noise isolation
- Enjoy long listening sessions without discomfort
- Maintain the original performance of your headphones
- Continue to enjoy your music in style and comfort
Don’t let worn-out ear pads compromise your listening experience. Replace them with high-quality replacement ear pads designed specifically for Beats Studio 3 headphones.
How to Remove the Old Ear Pads
If you are looking to upgrade or replace the ear pads on your Beats Studio 3 headphones, you’ll need to remove the old pads first. This process requires some care and attention to ensure you don’t damage the headphones or tear the ear pads. Follow these steps to safely remove the old ear pads:
- Start by using a spudger or a blunt knife to gently pry the old ear pads away from the headphones. Work your way around the edges, taking your time to avoid causing any damage.
- Once you have loosened the old ear pads, carefully peel them off the headphones. Be gentle and take your time to avoid tearing the pads or leaving any residue behind.
- After removing the old ear pads, you may notice some adhesive residue on the headphones. Use an Isopropyl Alcohol wipe to clean off any remaining adhesive. This step is important to ensure proper adhesion of the new ear pads.
By following these steps, you can safely remove the old ear pads from your Beats Studio 3 headphones, making way for the installation of new, upgraded pads.
Upgrade your Studio 3 with Genuine Beats Ear Pads
“Upgrading your Beats Studio 3 with genuine Beats ear pads can greatly enhance your listening experience. Not only do the new pads provide improved comfort, but they also ensure a better seal for enhanced sound quality and noise isolation. Don’t settle for generic or knock-off pads; invest in genuine Beats ear pads to get the best performance out of your Studio 3 headphones.” – Beats Audio Expert
When removing the old ear pads, take your time and be gentle to avoid any damage. Once you have successfully removed the old pads, you are ready to move on to the next step: installing the new ear pads.
Table: Comparison of Genuine Beats Ear Pads
| Ear Pad Model | Material | Compatibility | Price |
|---|---|---|---|
| Beats Studio 3 Ear Pad | Memory Foam | Beats Studio 3 | $29.99 |
| Beats Studio 3 Pro Ear Pad | Protein Leather | Beats Studio 3 Pro | $39.99 |
| Beats Studio 3 Wireless Ear Pad | Velour | Beats Studio 3 Wireless | $24.99 |
Table: Comparison of genuine Beats ear pads for various Studio 3 models. Choose the ear pad that best suits your preferences and needs for an upgraded listening experience.
Now that you know how to remove the old ear pads and have an understanding of the different options available, you can proceed with confidence to the next step: installing the new ear pads on your Beats Studio 3 headphones.
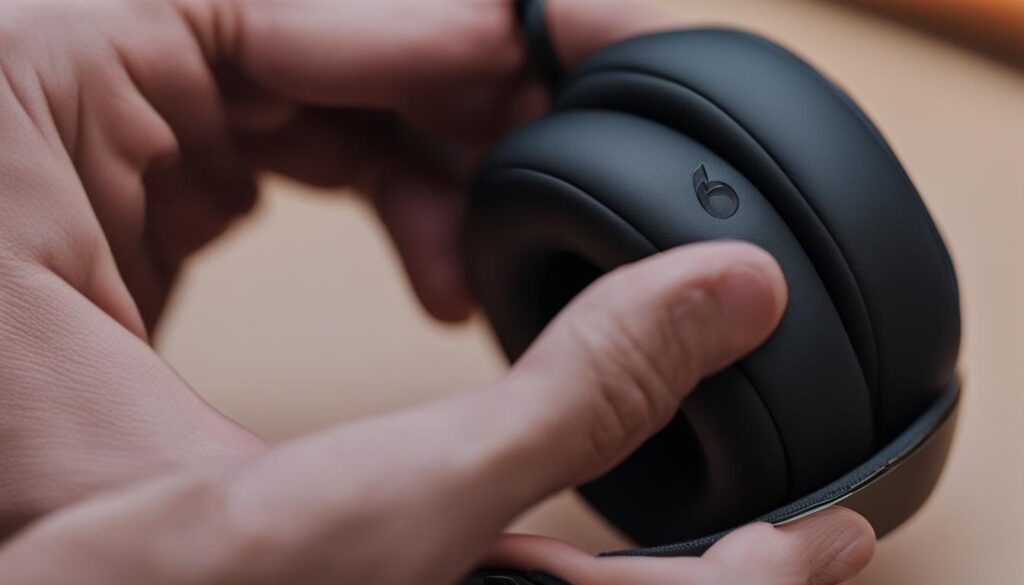
Installing the New Ear Pads
Once you have removed the old ear pads from your Beats Studio 3 headphones, it’s time to install the new ones. This step-by-step guide will walk you through the process and ensure a seamless installation.
Step 1: Prepare the New Ear Pads
If the new ear pads come with adhesive tape, remove the sticker to reveal the adhesive. Take a moment to inspect the new ear pads and ensure they are in good condition.
Step 2: Align and Attach
Carefully align the new ear pads with the screws on your headphones, matching the circles on the adhesive with the screws. Once aligned, press firmly on the ear pads for about a minute to activate the adhesive. This will ensure a secure and long-lasting attachment.
Step 3: Verify Proper Alignment
After attaching the new ear pads, double-check that they are properly aligned and seated on the headphones. Make any necessary adjustments to ensure a snug fit and optimal comfort.
Step 4: Apply Pressure
To ensure proper adhesion, place an object between your headphones and apply gentle pressure for 24 hours. This will help the ear pads adhere firmly and eliminate any gaps between the pads and the headphones.
That’s it! You have successfully installed the new ear pads on your Beats Studio 3 headphones. Now you can enjoy your favorite music with enhanced comfort and sound quality.

Applying Pressure and Allowing for Proper Adhesion
After attaching the new ear pads to your Beats Studio 3 headphones, it is crucial to apply pressure and allow for proper adhesion. This step ensures that the ear pads are securely attached and eliminates any potential gaps or loose areas. To achieve the best results, follow the instructions below:
Step 1: Prepare for Pressure Application
Place a soft, flat object between the ear cups of your headphones. This object should evenly distribute pressure across the entire surface of the ear pads. It could be a small book, a stack of papers, or any other smooth object that fits comfortably inside the ear cups. Make sure the object does not extend beyond the edges of the ear cups.
Step 2: Apply Pressure
Gently press down on the object to apply steady and consistent pressure to the ear pads. Hold the pressure for at least 1 minute to activate the adhesive and ensure a strong bond between the pads and headphones. Be careful not to overstretch the headphones or apply excessive pressure, as this can cause damage.
Step 3: Allow for Proper Adhesion
After applying pressure for 1 minute, leave the object in place for a minimum of 24 hours. This duration allows the adhesive to fully cure and ensures that the ear pads adhere properly to the headphones. During this time, avoid touching or adjusting the ear pads to prevent any disruption in the adhesion process.
By following these steps and allowing for proper adhesion, you can ensure that your new ear pads stay securely in place and provide optimal comfort during your listening sessions. Once the 24-hour period is complete, you can remove the object and enjoy your refreshed headphones with confidence.

| Type of Pressure Application | Benefits |
|---|---|
| Even Distribution | Prevents uneven adhesion and ensures a consistent bond between the ear pads and headphones. |
| Steady and Consistent | Allows the adhesive to activate evenly across the entire surface, creating a strong and durable connection. |
| Proper Curing Time | Gives the adhesive sufficient time to fully cure, maximizing its strength and longevity. |
Conclusion and Clean-up
Congratulations! You have successfully replaced the ear pads on your Beats Studio 3 headphones. By following the step-by-step instructions in this guide, you can restore the comfort, sound quality, and overall performance of your headphones. Now that the ear pad replacement process is complete, it’s important to properly dispose of the old ear cushions and clean up any adhesive residue or mess.
Dispose of the old ear cushions responsibly by placing them in the appropriate waste bin or following local recycling guidelines. This will help reduce environmental impact and ensure that the materials are disposed of in the correct manner. Additionally, clean up any adhesive residue or mess that may have been left behind during the removal and installation process.
Use a mild cleaning solution or Isopropyl Alcohol wipes to gently wipe away any remaining adhesive or dirt on your headphones. Take care not to damage the headphones or get any liquid inside the electronic components. Once you’ve cleaned the headphones, allow them to air dry completely before using them again.
With the new ear pads in place and your headphones cleaned up, you can now enjoy a brand new listening experience. The replacement ear pads will provide enhanced comfort, improved sound quality, and better noise isolation. Whether you’re using your headphones for music, movies, gaming, or calls, the new ear pads will ensure that you can enjoy your audio content to the fullest.

Remember to regularly check the condition of your ear pads and replace them as needed to maintain optimal performance. By taking care of your headphones and keeping them in good condition, you can prolong their lifespan and continue to enjoy superior audio quality for years to come.
Tools and Parts Needed for Ear Pad Replacement
When it comes to replacing the ear pads on your Beats Studio 3 headphones, having the right tools and parts is essential. Here is a list of everything you’ll need to successfully complete the replacement process:
- Pry tool or blunt knife
- Isopropyl Alcohol wipes
- Replacement ear pads compatible with the Studio 3 model
Using a pry tool or a blunt knife will allow you to gently remove the old ear pads without damaging the headphones. The Isopropyl Alcohol wipes are necessary to clean off any adhesive residue left on the headphones after removing the old pads. Finally, make sure to choose replacement ear pads that are specifically designed for the Beats Studio 3 model to ensure a perfect fit.
Table: Tools and Parts Needed for Ear Pad Replacement
| Tool/Part | Description |
|---|---|
| Pry tool or blunt knife | Used to gently remove the old ear pads from the headphones without causing damage. |
| Isopropyl Alcohol wipes | Used to clean off any adhesive residue left on the headphones after removing the old ear pads. |
| Replacement ear pads | Specifically designed for the Beats Studio 3 model to ensure a perfect fit during the replacement process. |
Gathering these tools and parts ahead of time will streamline the ear pad replacement process, ensuring that you have everything you need to complete the task efficiently. With the right tools in hand, you’ll be one step closer to enjoying a refreshed and comfortable listening experience with your Beats Studio 3 headphones.
Reasons to Replace Beats Studio 3 Ear Pads
The ear pads on the Beats Studio 3 headphones are an essential component that directly impacts your listening experience. Over time, these ear pads can deteriorate due to regular use and exposure to sweat and moisture. There are several compelling reasons why you should consider replacing the ear pads.
Improved Comfort and Support
Worn-out ear pads can lose their cushioning and support, leading to discomfort and reduced wearing time. By replacing the ear pads, you can restore the original comfort and support of your headphones. The new ear pads will provide a plush and comfortable fit, allowing you to enjoy your music for extended periods without any discomfort.
Enhanced Sound Quality
The ear pads play a crucial role in the sound quality of your headphones. Over time, the foam inside the ear pads can deteriorate, affecting the sound reproduction. By replacing the ear pads with new ones, you can ensure optimal sound quality and enhance your listening experience. The new ear pads will provide a better seal around your ears, improving bass response and reducing sound leakage.
Improved Noise Isolation
The ear pads on the Beats Studio 3 headphones contribute to the noise isolation capabilities of the headphones. Worn-out ear pads may not form a tight seal around your ears, allowing external noise to leak in and disrupt your listening experience. Replacing the ear pads will restore the noise isolation capabilities of your headphones, allowing you to immerse yourself in your music without any distractions.
Overall, replacing the ear pads on your Beats Studio 3 headphones is a worthwhile investment. It will not only improve the comfort and support of your headphones but also enhance the sound quality and noise isolation. By maintaining your headphones in optimal condition, you can continue to enjoy your favorite music with the utmost clarity and comfort.
Signs That You Need to Replace Beats Studio 3 Ear Pads
Over time, the ear pads on your Beats Studio 3 headphones may show signs of wear and tear, indicating that it’s time for a replacement. Recognizing these signs will help you maintain the optimal performance and comfort of your headphones. Here are the key indicators that you need to be aware of:
Sign 1: Flaking or Peeling
If you notice that the old ear pads are flaking or peeling, it’s a clear indication that they have reached the end of their lifespan. The flakes can be uncomfortable against your ears and can even get into the headphones, affecting the sound quality. Replacing the ear pads will ensure a smooth and comfortable listening experience.
Sign 2: Discomfort
When the ear pads lose their cushioning and support, they can become uncomfortable to wear for extended periods. You may experience pressure points, pain, or soreness on your ears. If you find yourself constantly adjusting the position of the headphones to alleviate discomfort, it’s time to replace the ear pads.
Sign 3: Noticeable Stench
If you detect an unpleasant odor coming from your Beats Studio 3 headphones, it’s a sign that the ear pads have accumulated sweat, dirt, or bacteria over time. Despite cleaning efforts, the odor may persist. Replacing the ear pads will eliminate the stench and ensure a fresh and hygienic audio experience.
Sign 4: Deformation
Over time, the ear pads may lose their shape or become deformed due to frequent use or exposure to heat and moisture. Deformed ear pads can compromise the seal around your ears, affecting noise isolation and sound quality. Replacing them will restore the original form and ensure optimal performance.
Sign 5: Ineffective Noise Cancellation
The ear pads play a crucial role in the noise cancellation feature of your Beats Studio 3 headphones. If you notice a significant reduction in the effectiveness of noise isolation, it could be a sign that the ear pads are no longer providing a proper seal. Replacing them will restore the headphones’ ability to block out external noise and enhance your listening experience.
By paying attention to these signs, you can proactively replace the ear pads on your Beats Studio 3 headphones, ensuring optimal comfort, sound quality, and performance. Don’t let worn-out ear pads diminish your audio experience; take action and enjoy your music to the fullest!
Factors to Consider When Buying Replacement Ear Pads
When purchasing replacement ear pads for your Beats Studio 3 headphones, there are several factors to consider to ensure you make the right choice. These factors will help you select ear pads that not only fit your headphones but also provide the desired comfort and performance.
Quality and Material
One of the most important factors to consider is the quality of the ear pads. Look for pads made of high-grade foam that offers excellent cushioning and durability. Additionally, consider the material used for the ear pads. Some common materials include leather, protein leather, and velour. Each material has its own unique feel and characteristics, so choose the one that suits your preferences best.
Size and Fit
Ensure that the replacement ear pads are specifically designed for the Beats Studio 3 model. This will ensure a perfect fit and compatibility with your headphones. It’s also worth considering the size of the ear pads. Some ear pads are larger than others, which can provide additional comfort and better noise isolation. However, larger ear pads may affect the portability and aesthetics of your headphones, so consider your priorities before making a decision.
User Reviews and Ratings
Before purchasing replacement ear pads, take the time to read reviews and ratings from other users. Their experiences can provide valuable insights into the comfort, durability, and overall quality of the ear pads. Look for ear pads with positive reviews and high ratings to ensure a satisfying purchase.
By considering these factors when buying replacement ear pads for your Beats Studio 3 headphones, you can make an informed decision that will enhance your listening experience. Remember to prioritize quality, fit, and user satisfaction to ensure the best possible outcome.
Table: Comparison of Replacement Ear Pads for Beats Studio 3
| Brand | Material | Size | Comfort | Noise Isolation | Price |
|---|---|---|---|---|---|
| Brand A | Leather | Standard | ★★★☆☆ | ★★★☆☆ | $ |
| Brand B | Protein Leather | Large | ★★★★☆ | ★★★★☆ | $$ |
| Brand C | Velour | Standard | ★★☆☆☆ | ★★☆☆☆ | $ |
| Brand D | Leather | Large | ★★★★★ | ★★★★★ | $$$ |
Note: The ratings provided are based on user reviews and may vary depending on individual preferences and experiences.
Conclusion
In conclusion, replacing the ear pads on your Beats Studio 3 headphones is a simple and effective way to improve your listening experience. By following the step-by-step instructions provided in this guide, you can easily remove the old ear pads, install the new ones, and ensure proper adhesion for long-lasting comfort and performance.
With the new ear pads, you’ll enjoy enhanced sound quality, improved noise isolation, and a comfortable fit that allows you to listen to your favorite music for extended periods without discomfort. Whether you’re a music enthusiast, a gamer, or someone who relies on headphones for work or travel, replacing the ear pads will breathe new life into your Beats Studio 3 headphones.
So, if you’ve noticed signs of wear and tear on your current ear pads or if you simply want to upgrade your headphones, don’t hesitate to invest in replacement ear pads. With minimal effort and the right tools, you can transform your Beats Studio 3 headphones into a premium audio accessory that provides an immersive and enjoyable listening experience.
FAQ
Why should I replace the ear pads on my Beats Studio 3 headphones?
Replacing the ear pads can restore comfort, support, and enhance the overall listening experience.
How do I remove the old ear pads?
Gently use a spudger or blunt knife to pry the old ear pads away from the headphones. Take care not to damage the headphones or tear the ear pads.
How do I install the new ear pads?
Align the new ear pads with the screws on your headphones and press them firmly for a minute to activate the adhesive. Make sure the ear pads are properly aligned and seated on the headphones.
How long should I apply pressure after installing the new ear pads?
Put an object between your headphones to apply pressure for 24 hours. This ensures proper adhesion and eliminates any gaps.
What tools and parts do I need for ear pad replacement?
You will need a pry tool or blunt knife to remove the old ear pads, Isopropyl Alcohol wipes to clean the headphones, and replacement ear pads that are compatible with the Studio 3 model.
What are the signs that I need to replace the ear pads?
Signs include flaking or peeling of the old ear pads, discomfort while wearing the headphones, a noticeable stench, deformation of the ear pads, and ineffective noise cancellation.
What factors should I consider when buying replacement ear pads?
Consider factors such as the quality of the pads, the material used, the feel of the pads, and your specific usage requirements.